milk bar mondays – chocolate chocolate cookies

Not just chocolate.

But chocolate chocolate.

(In case you haven’t figured it out, I made you uber-chocolatey cookies today.)

I know I’ve told you, but I was never been a huge chocolate person.

Yes. I said was.

Being on paleo has made me crave chocolate like whoah. Like, allllll the time! I have no idea what’s going on!

But since I can’t eat chocolate (the competition is in just 2 weeks, eeep!), I curb my cravings with fruit and jars & jars of nut butter. I’ve recently discovered Barney Butter, which is the most amazeballs almond butter made on this planet. It’s totally that good. Go buy a jar, or three. Then buy yourself some macadamia butter. Say whaaaa?? Yeah, it exists. And totally rocks my life.

Anywho, like I said, I can’t really eat chocolate right now, but when I saw we were making these cookies for Milk Bar Mondays, I knew it’d be a problem. I mean, how could I resist chocolate CHOCOLATE cookies?!

I couldn’t. Obvi.

These cookies were super duper chocolatey, just as promised. It was great how easy these were to put together. You just make a chocolate crumb, then add it to the chocolate cookie dough. Too easy! The chocolate crumb adds a nice texture & salty bite to the cookie.

If I’m being honest though, I thought the cookie was the most “normal” recipe I’ve made for Milk Bar Mondays. Usually, I find the desserts to be unique and unbelievably delicious. And while this chocolate cookie was good, they just weren’t anything spectacular. I still prefer my favorite triple chocolate cookies.

For the recipe, visit Cassie at Bake Your Day. And don’t forget to say hey to the rest of the Milk Bar Monday girls and check out their Chocolate Chocolate Cookies!


Audra at The Baker Chick
Erin at Big Fat Baker
Jacqueline at The Dusty Baker
Krissy at Krissy’s Creations
Meagan at Scarletta Bakes


Follow the Milk Bar Monday ladies on Twitter! 

milk bar mondays – grasshopper pie

Well, hey there! Long time no… talk? see? read?

Yeah. I know. Totes on me.

Life has just been… life.

But I wanna tell y’all a secret.

Have you heard of CrossFit? Well, I dig it. It’s kind of my jam.

I have a pretty big competition coming up at the end of July. Also, it’s my first competition. Also, it’s being held in the Rose Bowl. Also. Also. Also… I’m really scurrrred.

And I’m super excited! It’s a team competition and I know we’re going to have an awesome time!

So, basically, I’ve been training overtime to prepare for this little shindig. Hence, my disappearance. I blame this on my less than stellar time management skills.

I also blame this on the fact that I am doing the Paleo Challenge to aid in my competition prep. I’m on Day 15 and it’s just as hard as it sounds. Especially the no sugar. And the no grains. Aaaand the no dairy too. Minus all that, I feel fantastic! Yay cavemen!

Sadly, Paleo has led me to not bake as much for I am not a strong willed person!

BUT DON’T WORRY! This isn’t forever. Geez!

If you’re curious to know what I’m eating, you can follow me on Instagram, or let me know if you’d like me to share some Paleo recipes! I’d love to mix it up for a couple months!

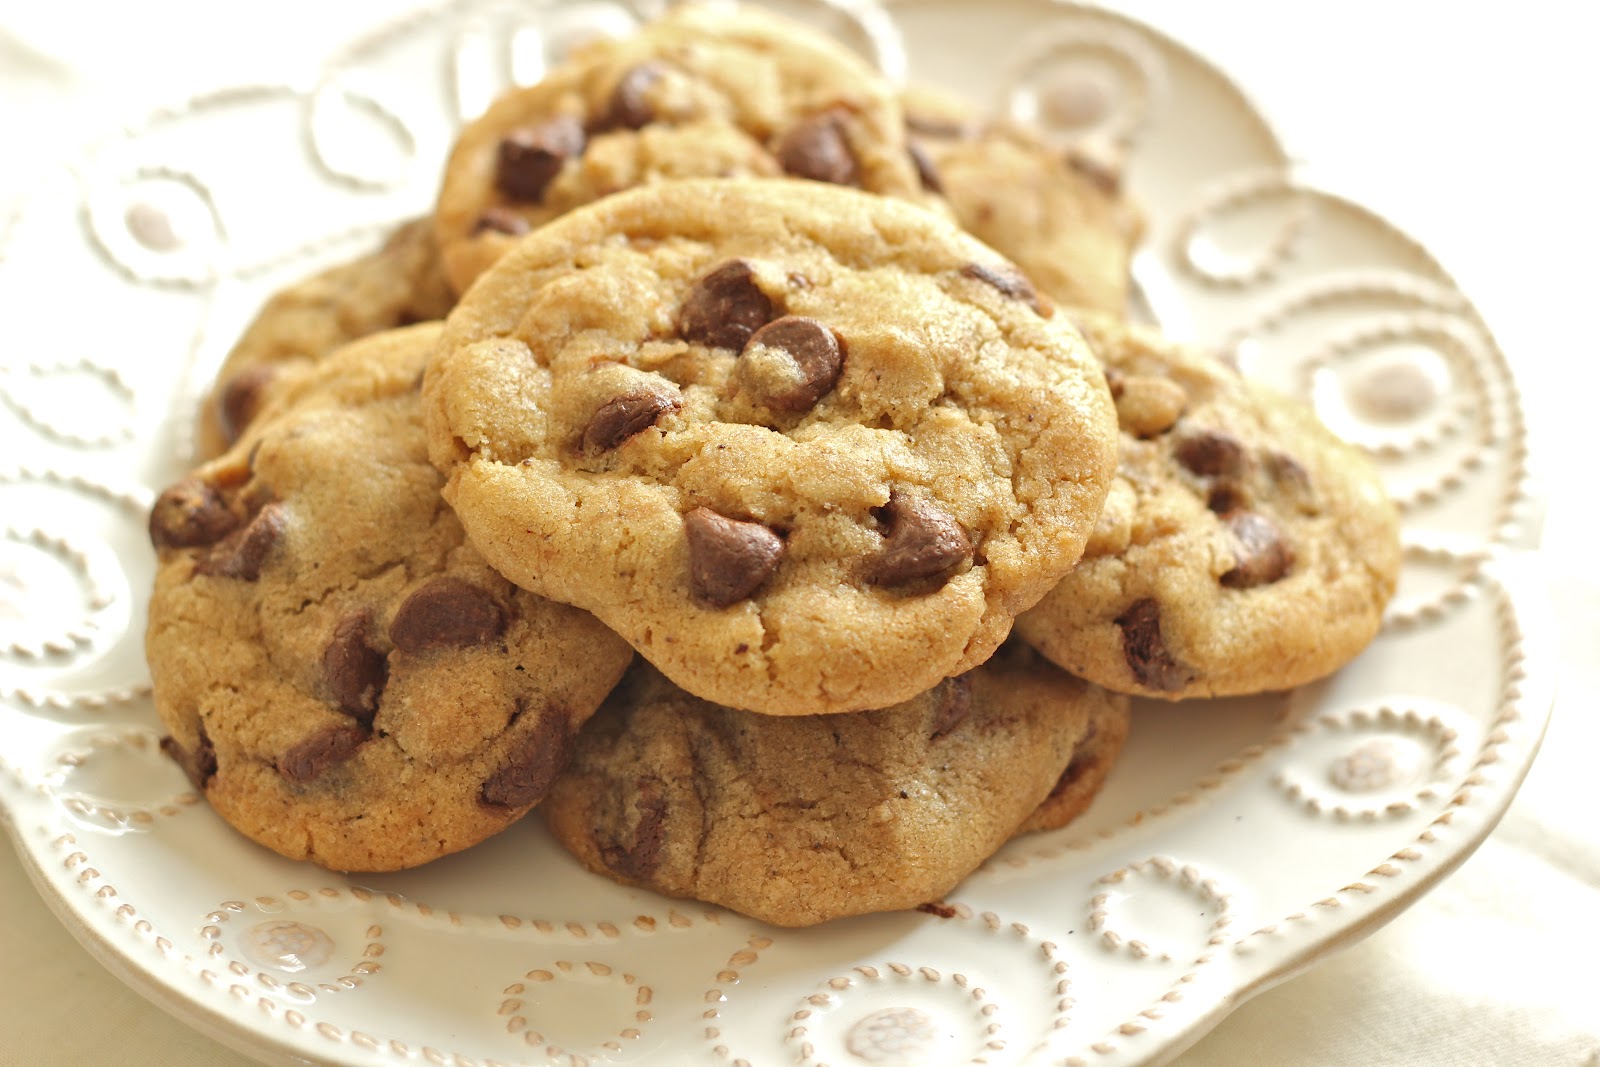
Just know that I’m still baking up treats for my coworkers and friends that are sane & eat a normal diet which allows dessert. Enter: the Grasshopper Pie, the latest from our Milk Bar Mondays group.

Minty, chocolatey, marshmallowy, brownie pie-y, goodness.

Believe it or not, I know this pie is fantastic. One- just look at the ingredients. Two- I stared creepily at friends while they ate it and their faces said it all. GLORIOUS.

Super gooey from the brownie pie filling & the marshmallows. Creamy & minty from the mint cheesecake filling. Crunchy graham crust. Melty chocolate chips & a cool mint glaze to top it all off.

This was such a winner! Everyone seriously loved it! Even with a few components to make, this came together surprisingly quick. I hiiiiighly recommend you make this! And then eat a slice for me!


Don’t forget to say hey to the rest of the Milk Bar Monday girls and check out their takes on the Grasshopper Pie!

Audra at The Baker Chick

Grasshopper Pie
makes 1 10-inch pie

1 recipe Mint Cheesecake Filling (recipe follows)
1 recipe Brownie Pie (recipe follows)

20 g  (2 tablespoons) mini chocolate chips
25 g (1/2 cup) mini marshmallows

1 recipe Mint Glaze (recipe follows)

To assemble the pie:
Heat the oven to 350 degrees F.

Grab a sheet pan and put your pie tin of graham crust on it. Pour the mint cheesecake filling into the shell. Pour the brownie batter on top of it. Use the tip of a knife to swirl the batter and mint filling, teasing up streaks of the mint filling so they show through the brownie batter.

Sprinkle the mini chocolate chips into a small ring in the center of the pie, leaving the bulls eye center empty. Sprinkle the mini marshmallows into a ring around the ring of chocolate chips.

Bake the pie for 25 minutes. It should puff slightly on the edges but still be jiggly in the center. The mini chocolate chips will look as if they are beginning to melt, and the mini marshmallows should be evenly tanned. Leave the pie in the oven for an additional 3 to 4 minutes if this is not the case.

Cool the pie completely before finishing it. (You can speed up the cooling process by carefully transferring the pie to the fridge or freezer directly out of the oven if you’re in a hurry.

Now the pie needs to be Jackson-Pollocked with mint glaze. Make sure your glaze is still warm to the touch. Dunk the tines of a fork into the warm glaze, then dangle the fork about 1 inch above the bull’s eye center of the pie.

Transfer the pie to the fridge so the mint glaze firms up before serving – which will happen as soon as it’s cold, about 15 minutes. Wrapped in plastic, the pie will keep fresh in the fridge for up to 1 week or in the freezer for up to 2 weeks.

Graham Crust
190 g (1 1/2 cups) graham cracker crumbs
20 g (1/4 cup) milk powder
25 g (2 tablespoons) sugar
3 g (3/4 teaspoon) kosher salt
55 g (4 tablespoons) unsalted butter, melted, or as needed
55 g (1/4 cup) heavy cream

Toss the graham crumbs, milk powder, sugar, and salt with your hands in a medium bowl to evenly distribute your dry ingredients.

Whisk the butter and heavy cream together. Add to the dry ingredients and toss again to evenly distribute. The butter will act as a glue, adhering to the dry ingredients and turning the mixture into a bunch of small clusters. The mixture should hold its shape if squeezed tightly in the palm of your hand. If it is not moist enough to do so, melt an additional 14 to 25 g (1 to 1 1/2 tablespoons) butter and mix it in.

Eat immediately, or deploy as directed in a recipe. The crust is easiest to mold just after mixing. Stored in an airtight container, graham crust will keep fresh for 1 week at room temperature for 1 month in the fridge or freezer.

Mint Cheesecake Filling
60 g (2 ounces) white chocolate
20 g (2 tablespoons) grapeseed oil
75 g (2 1/2 ounces) cream cheese
20 g (2 tablespoons) powdered sugar
2 g (1/2 teaspoon) peppermint extract
1 g (1/4 teaspoon) kosher salt
2 drops green food coloring

Combine the white chocolate and oil in a microwave-safe dish and gently melt the mixture on low for 30 to 60 seconds. Use a heatproof spatula to stir the chocolate and oil together, working until the mixtures is glossy and smooth.

Combine the cream cheese and powdered sugar in the bowl of a stand mixer fitted with the paddle attachment and stir together on medium-low speed for 2 to 3 minutes to blend. Scrape down the sides of the bowl.

On low speed, slowly stream in the white chocolate mixture. Mix for 1 to 2 minutes, until it is fully incorporated into the cream cheese. Scrape down the sides of the bowl.

Add the peppermint extract, salt, and food coloring and paddle the mixture for 1 to 2 minutes, or just until it is smooth and leprechaun green. (You may need to scrape the bowl down once mid-mixing.) No point in making ahead – you don’t have any use for it otherwise and it will make it trickier to swirl in later.

Brownie Pie
3/4 recipe (255 g, 1 1/2 cups) Graham Crust
125 g (4 1/2 ounces) 72% chocolate
85 g (6 tablespoons) unsalted butter
2 eggs
150 g (3/4 cup) sugar
40 g (1/4 cup) flour
25 g (3 tablespoons) cocoa powder
2 g (1/2 teaspoon) kosher salt
110 g (1/2 cup) heavy cream

Dump 210 g (1 1/4 cups) graham crust into a 10-inch pie tin and set the remaining 45 g (1/4 cup) to the side. With your fingers and the palms of your hands, press the crust firmly into the pie tin, covering the bottom and sides of the pan completely. Wrapped in plastic, the crust can be refrigerated or frozen for up to 2 weeks.

Combine the chocolate and butter in a microwave-safe bowl and gently melt them together on low for 30 to 50 seconds. Use a heatproof spatula to stir them together, working until the mixture is glossy and smooth.

Combine the eggs and sugar in the bowl of a stand mixer fitted with the whisk attachment and whip together on high for 3 to 4 minutes, until the mixture is fluffy and pale yellow and has reached the ribbon state. (Detach your whisk, unk it into the whipped eggs, and wave it back and forth like a pendulum: the mixture should form a thickened, silky ribbon that falls and then disappears into the batter.) If the mixture does not form ribbons, continue whipping on high as needed.

Replace the whisk with the paddle attachment. Dump the chocolate mixture into the eggs and briefly mix together on low, then increase the speed to medium and paddle the mixture for 1 minute, or until it is brown and completely homogeneous. If there are any dark streaks of chocolate, paddle for a few seconds longer, or as needed. Scrape down the sides of the bowl.

Add the flour, cocoa powder, and salt and paddle on low speed for 45 to 60 seconds. There should be no clumps of dry ingredients. If there are any lumps, mix for an additional 30 seconds. Scrape down the sides of the bowl.

Stream in the heavy cream on low speed, mixing for 30 to 45 seconds, just until the batter has loosened up a little and the white streaks of cream are fully mixed in. Scrape down the sides of the bowl.

Detach the paddle and remove the bowl from the mixer. Gently fold in the 45 g (1/4 cup) graham crust with a spatula. (These crumbs will add little bursts of flavor and texture into the pie filling.)

Mint Glaze
30 g (1 ounce) white chocolate
6 g (2 teaspoons) grapeseed oil
0.5 g (scant 1/8 teaspoon) peppermint extract
1 drop green food coloring

Combine the white chocolate and oil in a microwave-safe dish and melt the chocolate on low for 20 to 30 seconds. Use a heatproof spatula to stir the oil and chocolate together, working until the mixture is glossy and smooth.

Stir in the peppermint extract and food coloring.


Source: Momofuku Milk Bar cookbook

brown butter chocolate chip cookies

Me want cookie.

a la Cookie Monster.

That guy is so cool. With his googly eyes and questionable, yet super awesome eating habits.

Anyway. You guys. I’ve been a cookie baking machine.

Something about being sick the past couple weeks has made me crave cookies like something fierce. Maybe it’s that chocolate chip cookies always feel like the ultimate comfort food.

I love that they are so simple, yet so delicious. I love that you can eat them warm out of the oven. Note: warm. Not straight-off-the-pan-and-still-sort-of-baking HOT.

Bottom line, I love me some cookies. They’re just about the only dessert that I eat and eat and eat. And eat.

On the day I was feeling the crappiest, I decided that I really needed cookies. Warm, gooey chocolate chip cookies. Never mind that I couldn’t really taste anything. Never mind that I should have been sleeping off the drowsy pills.

My medicated self decided that boiling butter over a fire to brown it would be a good move. What a smart person she is. I like her.

So, I baked these up using my favorite chocolate chip cookie recipe, but with brown butter. The smell alone was outrageous. I inhaled three of them for the sake of having my cookies.

But, I made Matt taste test since I was clearly not qualified. His reaction? Pure bliss. Then I had my co-workers taste them. Record timing of treat disappearance. These cookies were seemingly winners.

Luckily, I saved myself some cookie dough to bake up when my tastebuds decided to rejoin the party.

And woah. Just woah. These are the best dang chocolate chip cookies everrrrr. Obviously to be enjoyed with a glass of milk. Duh.


Brown Butter Chocolate Chip Cookies
makes 24+ cookies
Printer-Friendly Version

Ingredients:

12 tablespoons (1 1/2 sticks) unsalted butter
2 cups PLUS 2 tablespoons flour
1/2 teaspoon baking soda
1/2 teaspoon salt
1 cup brown sugar, packed
1/2 cup sugar
1 egg PLUS 1 egg yolk
2 teaspoons vanilla extract
2 cups semi-sweet chocolate chips


Directions:
Preheat oven to 325 degrees F. Line two cookie sheets with parchment paper.

In a small saucepan over medium heat, melt the butter until browned and little black bits start to form on the bottom, about 5 minutes. Remove from heat and cool until warm.

In a medium bowl, whisk together the dry ingredients. Set aside.

In the bowl of a stand mixer fitted with the paddle attachment, cream the sugars and brown butter on medium-high speed until lightened in color and creamy, about 3-4 minutes. Add in the egg, egg yolk, and vanilla, mixing until combined. With the mixer on low, add the dry ingredients, mixing just until combined. Mix in the chocolate chips.

Scoop the dough (about 2 tablespoons) onto the prepared baking sheets. Bake for 12-14 minutes, or until lightly golden around the edges. Be careful not to overbake. Let cookies cool on pan for 10 minutes then transfer to a wire rack to cool completely.

Enjoy!


Source: adapted from Annie’s Eats

Om nom nom nom nom.

milk bar mondays – compost cookies

Composting is cool.

Especially when it results in cookies.

So, I’m just gonna throw this out there. Mondays are working their way up to becoming my favorite day of the week.* Say whaaaaa?!

I know. What a weirdo.

But these Milk Bar Monday posts are totes exciting for me. I am so in love with everything we’ve baked so far!

This week, Krissy chose Compost Cookies. They’re a Milk Bar favorite, and I get it. The cookies are stuffed full with crazy things like graham crust and potato chips. Sounds questionable but it.just.works.

These cookies were really easy to make. You could actually just throw whatever you have in your pantry into these cookies. You pick the fillings! Just maybe not shrimp chips. <– Those totally exist & are super amazing. Don't question me.

Anyway, I wish I could explain how these cookies taste. Sweet, but salty. Crunchy, but chewy. Chocolatey, but kind of coffee-y. And since that helps in NO way, I’m just going to tell you that they’re fantastic. And that you should make them.

For the recipe, visit Krissy at Krissy’s CreationsAnd don’t forget to say hey to the rest of the Milk Bar Monday girls and check out their takes on the Compost Cookies!

Audra at The Baker Chick

*I’ve decided that Mondays are still only my 6th favorite day. Sloooowly but surely moving up.

nutella cupcakes

I don’t think you’re ready…

…for this jelly.

Ohhhh yeah. Totally bringing it today with the “Bootylicious” reference. Wut wuuuttt!

Which reminds me. Funny story. So right after high school, my family was packing up to move to Japan. I was dancing around to that song and got so into backing my thang up, that I tripped over boxes and fell into my suitcase, scraping my back on the plastic edge. And by scraping I obviously mean slicing open. So now I have a scar on my back that will forever and ever remind me of “Bootylicious”. I’m soooo lucky you guys.

Remember this teaser from Instagram?

Oh right. The cupcakes.

These cupcakes are no joke.

Super serious and super chocolatey. Let’s call them: Super Fantasmic Best Cupcakes of your Life. I wish I could shove one in your face right now so you could experience the true bliss that is the nutella cupcake.

First off, this chocolate cupcake is dooope. THE best that I’ve had. Ridiculously moist (eww) and fluffy.

Second, the nutella buttercream is  – actually, I don’t need to finish that. It’s freaking nutella buttercream!!

If you haven’t already sprinted out the door to go buy some nutella, I highly recommend that you do.

No, seriously. Do it.

Oh-ho, naughty cupcake!

Chocolate Cupcakes

makes 24+ cupcakes

Ingredients:
1 cup buttermilk
1/2 cup vegetable oil
2 eggs, at room temperature
1 teaspoon vanilla extract
1 3/4 cups flour
2 cups sugar
3/4 cups cocoa powder
2 teaspoons baking soda
1 teaspoon baking powder
1 teaspoon salt
1 cup hot coffee

Directions:
       
Preheat oven to 350 degrees F. Line two cupcake pans with liners.
       
In a medium bowl, combine the buttermilk, oil, eggs, and vanilla. Set aside.

In the bowl of a stand mixer fitted with the paddle attachment, sift together the flour, sugar, cocoa powder, baking soda, baking powder, and salt. Mix on low speed until combined. With the mixer still on low, slowly add the wet ingredients until just combined. Continuing to mix on low, add the coffee and mix just to combine. Scrape the sides and bottom of the bowl, and mix again to make sure everything is combined. The batter will be very thin.

Fill the cupcake liners about 2/3 full.  Bake for 15-18 minutes or until a toothpick inserted in center comes out clean.  Let cool in pan for 5 minutes then transfer to a wire rack to cool completely. 


Nutella Buttercream
makes enough to frost 24 cupcakes

Ingredients:
2 sticks unsalted butter, softened but cool
1 (13-ounce) jar of nutella
2 teaspoons vanilla extract
5 cups powdered sugar (sifted, then measured)
5-6 tablespoons heavy cream or milk

Directions:
In the bowl of a stand mixer fitted with the whisk attachment, whip the butter and nutella on medium-high speed until lightened in color and fluffy, about 5-6 minutes. Add in the vanilla and mix until combined. Slowly add in the powdered sugar, 1/2 cup at a time, and scraping down the sides of the bowl as needed.

With the mixer on low, add 4 tablespoons of heavy cream or milk, mixing until moistened. If the frosting is too dry, add an additional 1-2 tablespoons of heavy cream or milk. Turn the mixer to medium-high speed and whip until the frosting is smooth.

Decorate cupcakes as desired. Enjoy!

*NOTES:
– I transferred the cupcake batter to a spouted mixing bowl to easily fill the cupcake liners.
– There was enough left-over batter to make at least 4 regular sized or 12 mini cupcakes.

Source: cupcakes slightly adapted from Food Network (Ina Garten), frosting is a Sweet Peony original

DO IT.